LED Lighting Retrofit for an Older Home: Where to Start with LED Lighting Installation
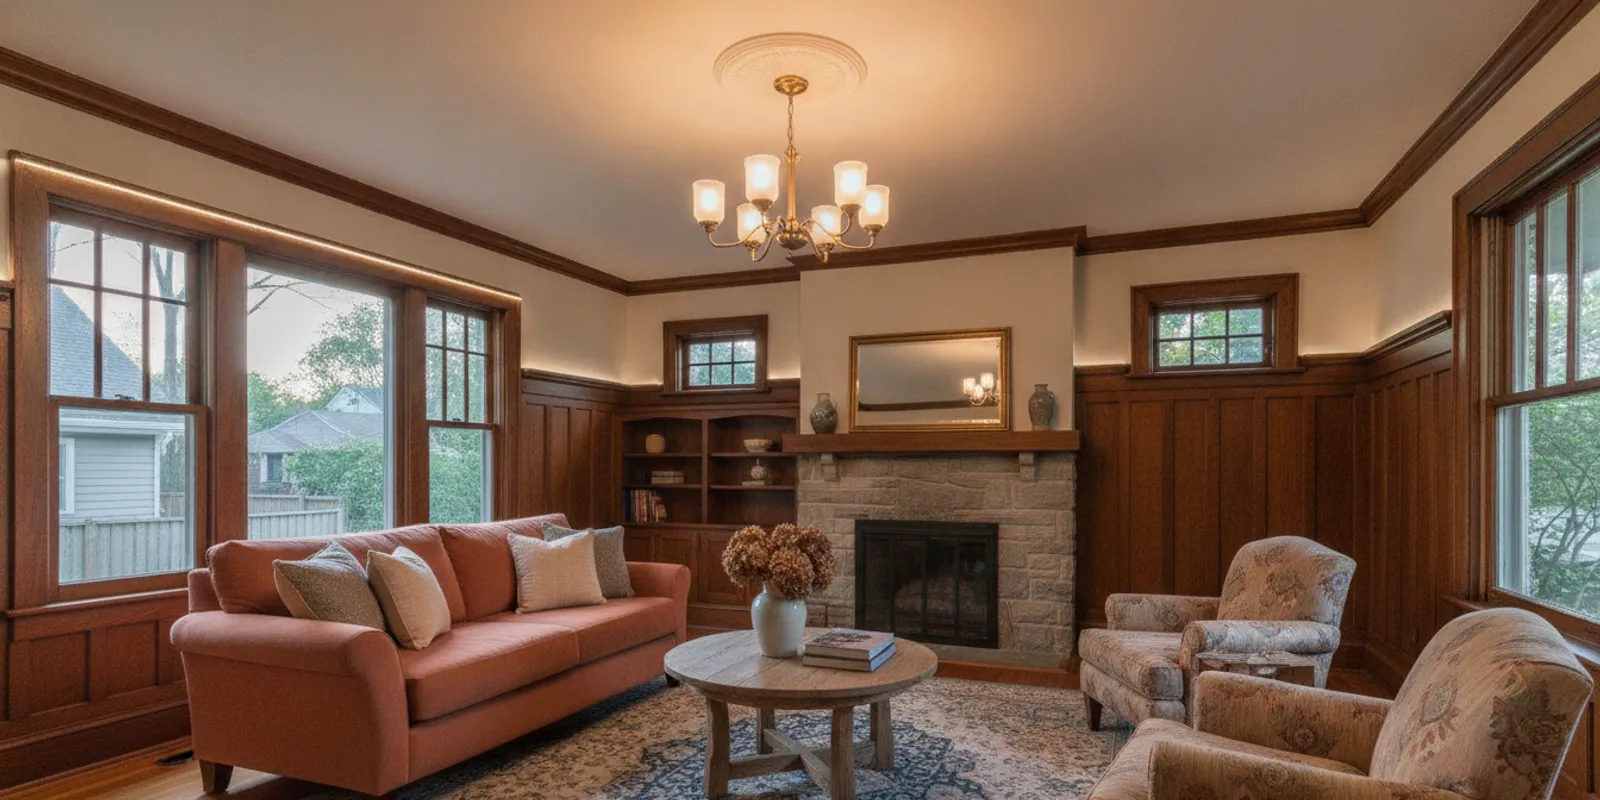
An LED lighting installation can make an older home easier to use and maintain, but the best retrofit is not simply a matter of replacing every bulb at once. Existing fixtures, switches, wiring, room use, and the light you want all affect the plan. Start by identifying the rooms and problems that matter most, then check compatibility before buying equipment or opening a fixture. A careful sequence helps you avoid mismatched bulbs, unwanted glare, and work that needs to be redone.
Why plan an LED retrofit room by room?
Older homes often have a mix of lighting from different periods. One room may have a central ceiling fixture, another may depend on table lamps, and a remodeled kitchen may have newer recessed lights beside older under-cabinet fixtures. The electrical work and the desired result may vary from one space to the next. A room-by-room plan lets you focus on the specific issue instead of treating every socket as if it needs the same lamp.
Common reasons to consider a retrofit include bulbs that need frequent replacement, dim rooms, uneven light, fixtures that feel dated, or a desire for easier controls. LED products are available in a wide range of shapes and light qualities, but that variety also means selection matters. The wrong lamp can protrude from a shade, create glare, look too cool or too warm, or fail to work properly with a dimmer.
Think of the project as three related decisions: what needs to change, which products suit the existing setup, and whether the electrical system or fixture needs attention. A bulb change may be simple when the fixture is in good condition and the lamp is compatible. A new fixture, added lighting point, altered control, or signs of damaged wiring call for a more careful assessment. If the home has layers of old and new work, do not assume the visible fixture tells the whole story.
What should you know about LED lighting installation in an older home?
LED lighting installation can mean several different kinds of work. It may be as limited as selecting replacement lamps, or it may involve replacing fixtures, adding task lighting, updating controls, or addressing an electrical issue discovered during planning. Define the scope before comparing products. Ask what outcome you want in each room: better visibility, less shadow, a more comfortable evening atmosphere, easier operation, or a consistent look across connected spaces.
LED lamps produce light differently from traditional incandescent lamps and are built with electronics as well as a light source. Product details therefore matter. Check the packaging and manufacturer instructions for the lamp's intended use, permitted fixture type, base, size, dimming compatibility, and any enclosure or temperature restrictions. A lamp that fits the socket is not automatically suitable for every fixture or control.
Older homes may also contain fixtures that are loose, damaged, unusually hot, poorly supported, or difficult to access. Those are not problems to solve by choosing a different bulb. Stop using a fixture if there are signs such as a burning odor, visible scorching, sparking, a hot switch or cover plate, repeated breaker trips, or buzzing that is new or worsening. Do not remove covers or handle wiring to investigate. Have a qualified electrician evaluate the condition.
For homes with historic details, preserve the features that give a room its character while improving how it works. A decorative fixture can sometimes remain in place with a suitable LED lamp, while a dark hallway may benefit more from improved placement or another lighting point. Plan around the home's actual construction and your priorities rather than assuming that a full replacement is necessary.
Where should you start in an older home?
Begin with a short walkthrough at the times when you use each space. Turn on the lights you normally use and note where you struggle to see, where light is uneven, and where a fixture is awkward to operate. Check rooms both during the day and after dark. Daylight can conceal a dim corner, while evening use may reveal glare or shadows that were not obvious earlier.
- List the rooms and tasks. Note activities such as cooking, reading, grooming, working, entertaining, or moving through a stairway. A room used for several purposes may need more than one kind of light.
- Record the existing setup. Write down the fixture type, number of lamps, switch locations, dimmers, and any lamps that are difficult to reach. Take photos of fixtures from a safe position to help with product selection or a service conversation.
- Describe the problem, not just the product. “The counter is shadowed” is more useful than “I want LEDs.” “The light is uncomfortable when dimmed” points toward a control and compatibility question.
- Mark anything that may need professional review. Include damaged fixtures, exposed conductors, flickering that continues with a new compatible lamp, warm switches, or any sign of electrical trouble.
- Choose a first phase. Prioritize spaces with an everyday need or a clear problem. You can complete the rest later after you see how the first changes look and work.
A simple room inventory can prevent impulse purchases. For each fixture, record the number of lamps and the information printed on the current lamp, if it is legible and safe to read. Also note whether the fixture is enclosed, recessed, decorative, or controlled by a dimmer. Do not climb onto an unstable chair or ladder to collect details. If a fixture is high or hard to reach, leave it for a professional visit.
Which rooms are good candidates for the first phase?
There is no single room that should always come first. The useful starting point is the area where an improvement would make the greatest difference in daily life, balanced against the complexity of the existing setup. A frequently used kitchen, a dark entry, or a room where you read may be a better first project than a rarely used storage area. The following comparison is a planning aid, not a recommendation to change every fixture.
| Area or fixture | What to assess | Possible first step | When to seek help |
|---|---|---|---|
| Kitchen work areas | Shadows on counters, glare, and how task lighting is controlled | Identify the work surfaces that need clearer, more even light | When adding fixtures, modifying wiring, or addressing an unsuitable existing fixture |
| Living and dining rooms | Fixture appearance, multiple uses, dimming, and light distribution | Check whether existing lamps and controls are compatible and provide the intended effect | When a dimmer causes flicker, noise, or an unreliable range |
| Hallways and stairs | Dark transitions, switch access, shadows, and safe visibility | Map where light is needed along the route and whether existing controls are convenient | When adding a light point or changing switching arrangements |
| Bedrooms and reading areas | Bedside access, reading needs, glare, and nighttime use | Separate general room lighting from focused reading light in the plan | When a new outlet, wall control, or hardwired fixture is part of the scope |
| Bathrooms and utility spaces | Fixture condition, intended location, dampness, and the quality of task light | Check product labeling and fixture instructions before selecting a replacement lamp | When a fixture is damaged, poorly sealed, or has signs of moisture-related deterioration |
| Exterior entries | Safe access, weather exposure, fixture condition, and light direction | Identify the area that needs visibility and review the fixture's outdoor rating | When replacing outdoor wiring, fixtures, controls, or damaged equipment |
Use the table to rank the work, not to diagnose electrical conditions. A professional can help distinguish a product-selection issue from a fixture, control, or wiring issue. Brilliant Home Services lists lighting installation among its service paths, and its electrical services page describes its electrical work. If you are unsure which type of help fits the project, ask before purchasing materials.
How do you choose the right LED lamp or fixture?
Start with the fixture's requirements, then compare light characteristics. A lamp's base must fit, but its shape and overall size must also fit inside the fixture without touching a shade or extending where it should not. Follow the fixture and lamp manufacturers' instructions, especially for enclosed fixtures and recessed housings. Do not use a product in an application the labeling excludes.
Next, consider how the light will feel in the room. Packaging may describe color appearance, brightness, and whether the lamp is dimmable. Compare products using their labeled information rather than relying on wattage alone. If possible, look at a sample in the actual room before buying enough lamps for the whole house. Painted walls, wood finishes, shades, and daylight can affect how the light appears.
- Match the use. General room lighting, focused task lighting, and accent lighting serve different purposes. A lamp chosen for a table lamp may not create the right result in a recessed ceiling fixture.
- Check the form factor. Confirm the base, lamp dimensions, reflector or globe shape, and clearance. A compatible base does not guarantee that the full lamp fits.
- Review dimmer compatibility. If a wall control dims the fixture, look for a product explicitly intended to work with that dimmer, and check the manufacturer's compatibility guidance. If the existing control is old or its operation is inconsistent, include it in the assessment.
- Consider enclosed or recessed fixtures. Use only lamps approved for the relevant fixture conditions. Instructions vary by product, so do not infer suitability from appearance.
- Keep a record. Save the model information and packaging or take a photo. Matching products later is easier when you know what was installed.
For some rooms, changing the lamp is enough. In others, the result depends on fixture placement, shade design, beam direction, or adding a separate layer of task light. If your goal is to brighten a countertop, replacing the central ceiling lamp alone may not eliminate the shadow created by the person standing at the counter. Consider the surface and the direction of light, not only the number of lumens on a package.
Lighting quality is personal. A very bright source in the wrong position can feel harsh, while a softer source may not provide enough visibility for detailed work. Test one representative location before standardizing a product throughout a room. If you are updating several rooms, make a small sample list and compare products in the evening and during daylight before deciding on a larger order.
What should you know about dimmers, switches, and older wiring?
A retrofit can expose a mismatch between a new lamp and an existing dimmer. Possible symptoms include flickering, visible stepping as the light changes, a restricted dimming range, a lamp that does not turn off reliably, or unwanted sound. These symptoms do not all have the same cause, and swapping products repeatedly may not solve the underlying problem. Confirm the lamp's stated dimmer compatibility and consult the dimmer manufacturer's information. If the combination remains unreliable, have it assessed.
Older homes may have switches and wiring that have been modified over time. The location of a switch, the age or condition of a device, and the way a fixture is supplied can affect the project. Do not assume that a switch box contains the wiring needed for a new control or that a visible wire color is enough to identify its function. Avoid opening a switch, fixture, or junction box as part of a do-it-yourself investigation.
Before replacing a fixture or control, note what does not work as expected and when it happens. Does flickering occur only at low dimming levels, only after a fixture warms up, or across several rooms? Does a breaker trip when a particular circuit is used? Does a switch feel hot or make a new sound? Share those observations with the electrician. If there is a burning smell, sparking, visible damage, or a hot device, stop using it and seek prompt professional guidance.
For more than a direct lamp replacement, the work may need assessment of the existing circuit, fixture support, control, and the proposed design. The right solution depends on what is present in the home. A qualified electrician can explain what needs to be changed and what can remain, rather than assuming that every older installation needs a complete rewire or that all existing equipment is suitable.
Can you replace LED lamps yourself?
A homeowner may be able to replace an ordinary lamp when the fixture is in good condition, accessible without unsafe climbing, and the product instructions support the application. Turn the fixture off and allow a recently used lamp to cool before handling it. Use a stable step ladder if needed, follow its safety instructions, and do not force a lamp into a socket. If the lamp is broken, the fixture is damaged, or the socket appears loose or scorched, stop and arrange a professional assessment.
Changing a lamp is different from installing a fixture or working on wiring. Hardwired fixture replacement, added lighting points, new switches, changes to a dimmer, and investigation of electrical faults involve more than selecting a compatible bulb. Keep the boundary clear: do not work on energized wiring, remove electrical covers, or try to correct loose connections yourself. If the project is more than a straightforward, safe lamp change, consult a qualified electrician.
For a room-by-room job, consider the cumulative access and handling involved. High ceilings, stairwells, fragile decorative fixtures, heavy fittings, and lamps in difficult locations add practical risk. A professional can also help confirm that the chosen product and control work together, and discuss whether a fixture change is more appropriate than continued bulb replacement.
What can affect an LED retrofit budget?
There is no reliable single price for an older-home lighting retrofit without knowing the scope and the conditions on site. A project limited to replacing compatible lamps is different from one that includes new fixtures, added wiring, changed controls, difficult access, or repair of an existing problem. Ask for a clear description of what is included before comparing proposals.
Factors that may affect the work include:
- Number and type of locations. A few accessible fixtures differ from a whole-house plan with several fixture styles and control types.
- Product choices. Lamp shape, fixture design, finishes, control features, and product specifications affect material selection.
- Access and installation conditions. High ceilings, tight spaces, existing finishes, and the condition of the fixture can change the work required.
- Electrical scope. New lighting points, circuit changes, switch replacement, or troubleshooting are different tasks from direct lamp replacement.
- Compatibility and testing. Dimmers and fixtures may need evaluation to achieve reliable operation with the selected products.
- Phasing. Completing priority rooms first can spread decisions over time, though separate visits may affect the overall project plan.
Ask whether a proposal includes the fixtures or lamps, installation, removal or disposal of old equipment, testing, and any identified repair. Confirm what assumptions the price depends on and how additional work would be discussed if something unexpected is found. Do not rely on a general estimate based solely on the home's age or square footage.
A lifecycle-cost approach can compare an initial project cost with expected use and maintenance over time, but the result depends on the products, how the rooms are used, and the assumptions in the calculation. A journal article describes combining lighting retrofit decisions with life-cycle cost analysis; it is useful background for the idea, not a price quote or a promise of savings for a particular home: lighting retrofit and life-cycle cost analysis. For your own project, compare like-for-like product details and avoid treating generalized payback claims as a guarantee.
How should you organize the project?
Good planning makes it easier to have a productive service conversation and reduces the chance of buying products that do not fit the scope. You do not need a complete lighting design before asking for help. A concise record of the goals, existing equipment, and questions is enough to begin.
- Make a priority list. Separate urgent concerns, such as a damaged or hot fixture, from comfort upgrades and appearance changes. Address suspected safety issues first.
- Gather information safely. Photograph visible fixtures and record accessible lamp labels. Note the room, switch type, and symptoms. Do not open equipment or climb to an unsafe location.
- Describe the preferred result. Explain whether you want improved task visibility, more even light, simpler operation, or a different look. Share the times and activities that matter.
- Ask about compatibility and scope. Find out whether the proposed lamps work with the existing fixtures and controls, and whether any fixture or wiring assessment is needed.
- Review the work plan. Confirm which rooms and fixtures are included, what products will be used, how testing will be handled, and how extra work will be approved.
- Evaluate the first phase. Once the work is complete, use the room under normal conditions. Note any remaining glare, shadows, control issues, or differences between spaces before extending the same choices elsewhere.
If you are planning other electrical work, mention it when discussing the retrofit. Coordinating related changes can make the overall plan clearer, but do not presume that separate projects can be combined without an on-site review. A home with old fixtures and newer additions may have different conditions in different rooms.
What questions should you ask before scheduling?
Use the first conversation to clarify how the work will be assessed, not to pressure yourself into choosing products immediately. A useful provider should be able to explain the proposed scope in plain language and identify what remains uncertain until the existing fixture or control is reviewed.
- Will the project be a lamp replacement, fixture replacement, control update, or a combination?
- How will you confirm the selected products are suitable for the existing fixture and any dimmer?
- Are there signs of damage or other conditions that should be evaluated before the retrofit proceeds?
- Which rooms and fixtures are included, and what is specifically excluded?
- What information or access should I prepare before the visit?
- How will any additional work or product changes be explained and approved?
- What testing will confirm the lights and controls operate as intended?
Choose the provider and scope based on clear communication, suitability for the work, and an explanation you understand. Brilliant Home Services serves the Chicagoland area and provides electrical and lighting services; learn more about the company on its About page. You can also review its Barrington electrical service information or contact the team to discuss the project. Details should be confirmed for your particular home and requested work.
Frequently Asked Questions
Should I replace every bulb in an older home at once?
Not necessarily. Start with rooms where the current light is inconvenient or a fixture has a clear need, then confirm product and control compatibility. A phased approach lets you evaluate the appearance and performance before choosing products for the rest of the home. Have damaged or concerning electrical equipment assessed rather than treating it as a routine bulb change.
Can I put an LED lamp in any old fixture?
No. The lamp must fit and be suitable for the fixture and application. Check the fixture and lamp instructions, including any restrictions for enclosed or recessed use, and review dimmer compatibility where relevant. If the fixture is loose, damaged, scorched, or otherwise questionable, do not use it until it has been assessed.
Why does an LED lamp flicker on a dimmer?
The lamp and dimmer may not be compatible, or another issue may be affecting operation. Check the manufacturer's compatibility information, but do not open the switch or fixture to investigate. If a compatible pairing still flickers, makes noise, or has an unreliable dimming range, ask a qualified electrician to assess the control and installation.
Does a lighting retrofit always require new wiring?
No. Some projects involve only suitable lamp replacements, while others need a fixture, control, or wiring change. The actual scope depends on the condition and layout of the existing system and the changes you want. An electrician can evaluate the home and explain what is necessary without assuming that every older home needs the same work.
What should I do if a switch or fixture feels hot?
Stop using it and seek professional guidance, especially if there is a burning odor, discoloration, sparking, or a breaker trip. Do not remove covers or attempt a wiring repair. Share what you noticed and when it occurred so the issue can be evaluated appropriately.
Where do you go from here?
A practical LED retrofit begins with your home's real needs: which rooms are uncomfortable or inconvenient, which fixtures and controls are already present, and which changes require professional work. Make a short list, document visible details safely, and decide which area deserves attention first. Then confirm the products and project scope before buying for the entire house. A room-by-room plan helps an older home gain useful, comfortable lighting while respecting the condition and character of its existing fixtures.
Ready to Get Started?
Contact Brilliant Home Services for professional, reliable service in Chicagoland. We are available 24/7 for emergencies.